
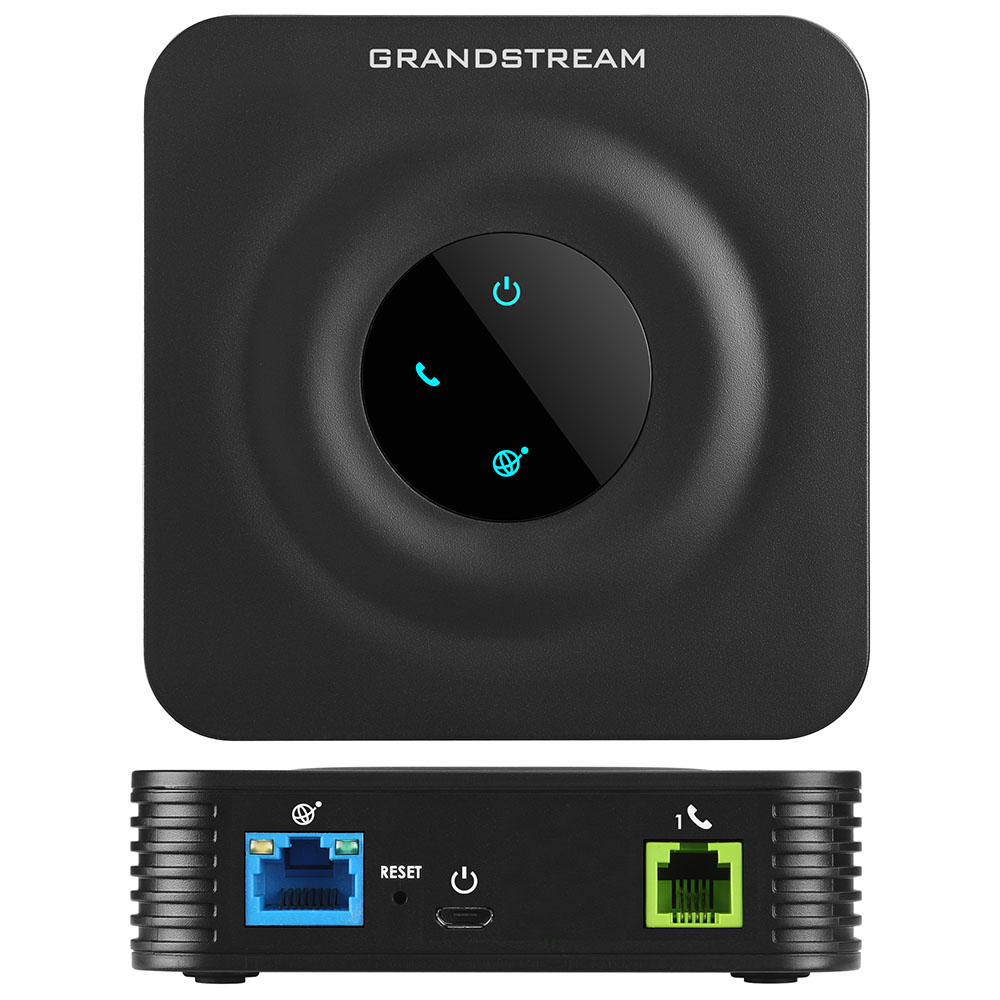
Connecting a Grandstream HT80X (HT801 or HT802) to Twilio SIP
March 30, 2021The Inspiration
I'm diving into all of Twilio's products and trying to learn as much as I can about them. The best way I learn is by actually doing it and trying to build it myself. My focus on this project was learning about SIP Trunking. It seemed pretty straightforward, but as always the devil is in the details and there are always nuances to learn about everything.
Future Goal
I wanted to get an Analog Telephone Adapter, so I can hook up up an old landline telephone with an obnoxious bell and have it wake me up like an alarm clock ⏰.
Picking The Hardware
There's a bunch of Analog Telephone Adatpers (ATA) out there. I was also looking at the Cisco ATA 191 but ultimately settled on the Grandstream HT801 because it was less than $20 from someone on eBay and I found these instructions from Nick Busey on how to set up the device specifically with Twilio SIP. I thought that because it was a recent post, that I wouldn't have much difficulty trying to configure it. Here's the Amazon link.
Getting Started
I had orginally followed Nick's instructions but there were some drawbacks. I had trouble with inbound calls and also triggering calls with the REST API.
Steps
- Open ports in your router's firewall
- Configure Outbound Calls
- Configure Inbound Calls
- Configure the Grandstream device
Unfortunately, in Nick's use-case, he only needed outbound calling, which made the phone only half as useful for me haha. I recognized his name as the creator/maintainer of the HomeLabOS project. So I knew I could find him on the HomeLabOS Zulip Chat and asked him a few questions on if he was able to get outbound AND inbound calling working. He graciously answered a few of my questions. Unfortunately, he doesn't use the device anymore and didn't look into getting inbound calls more.
So, at this point I was able to configure the device and have outbound calling going, but I needed more. So, I logged a Service Ticket with Twilio. Again, this was a good excuse to learn more about Twilio by using the products like Customer Support.
A customer service rep was able to help me troubleshoot the issue and taught me a few things along the way, like this... ~~
Pro Tip:
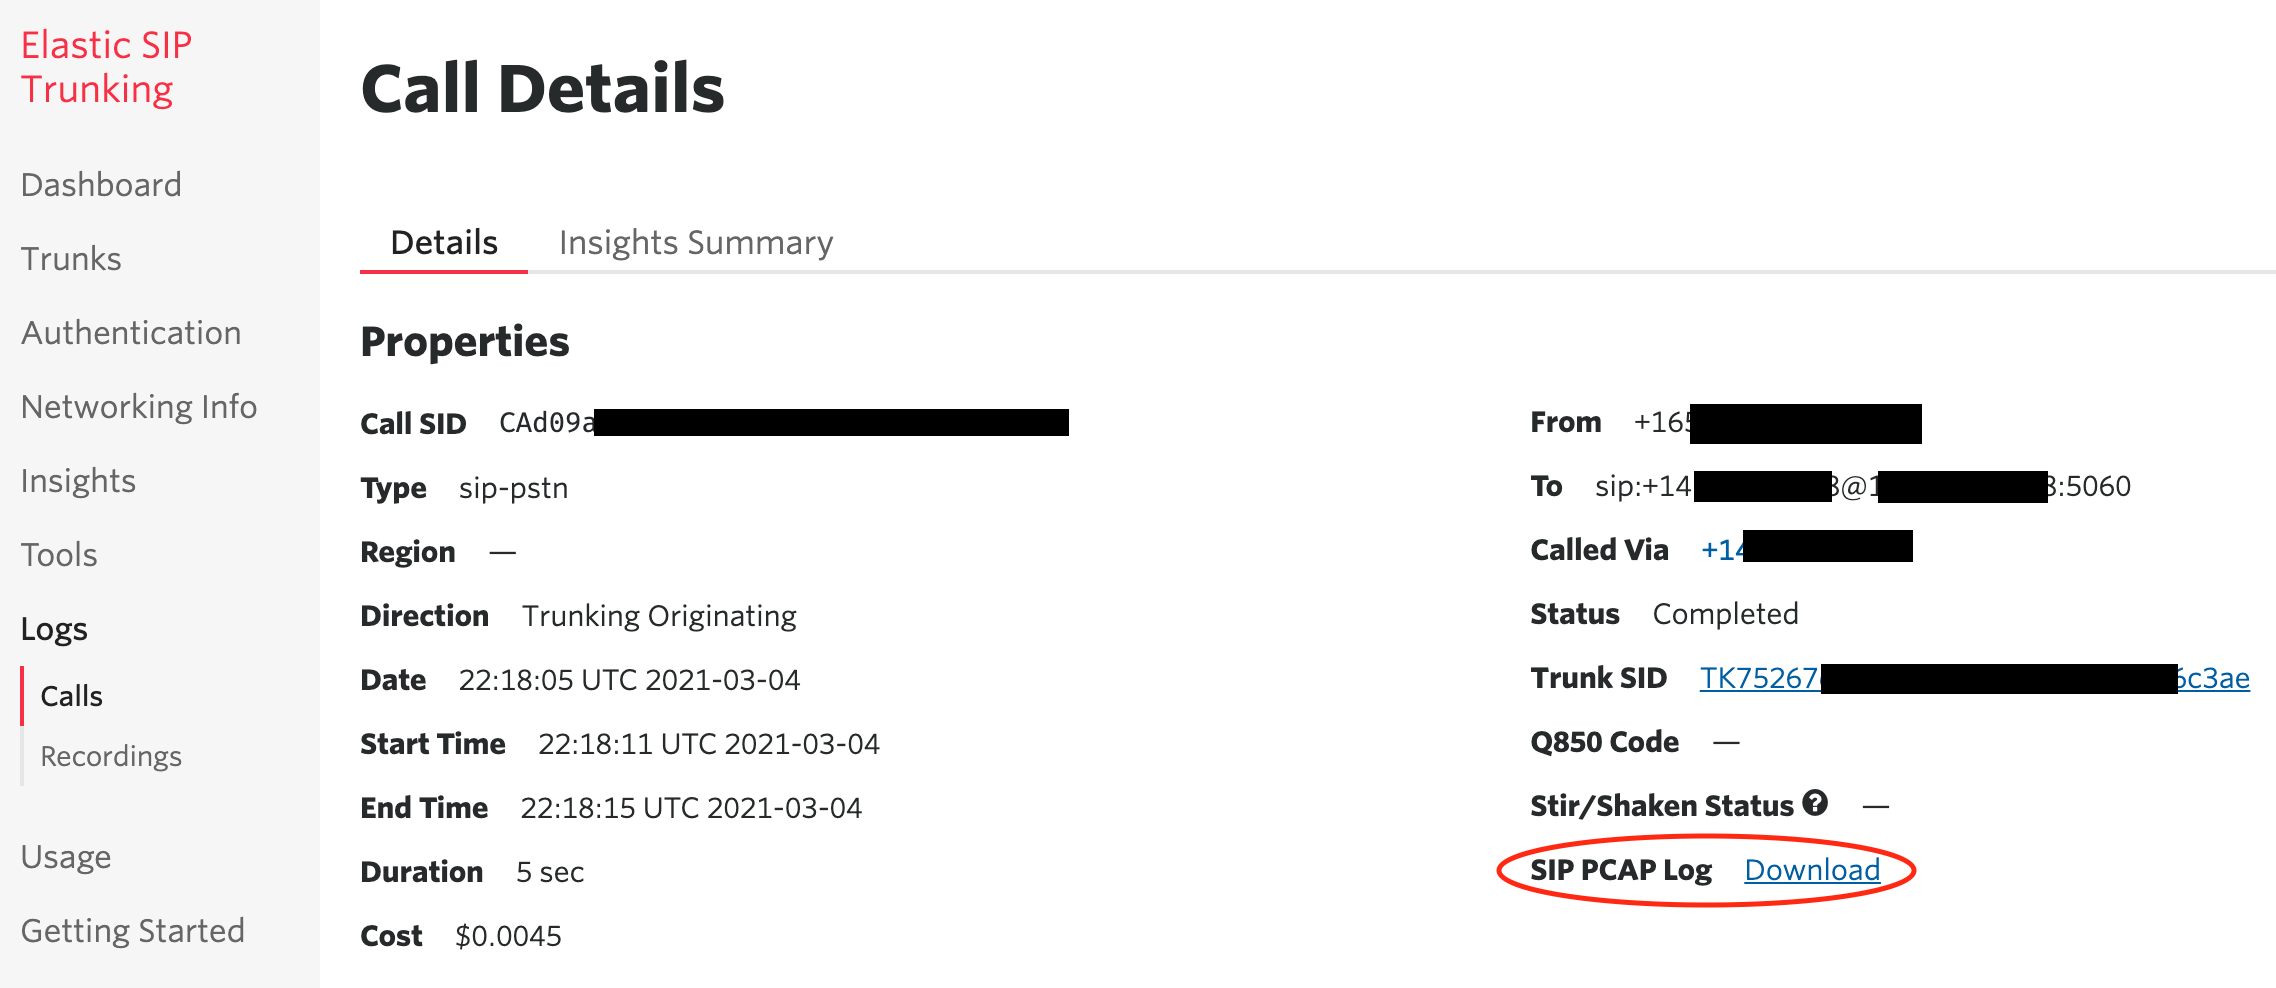
You can download the PCAP file and explore it with WireShark to explore the headers and see what's going on during the connection process.
During the connection process for incoming calls, he explained that the Contact section in the Header was trying to return the local IP address of the ATA box instead of my public IP address of my home internet connection -- so something was literally getting lost in translation, well the Network Address Translation (NAT).
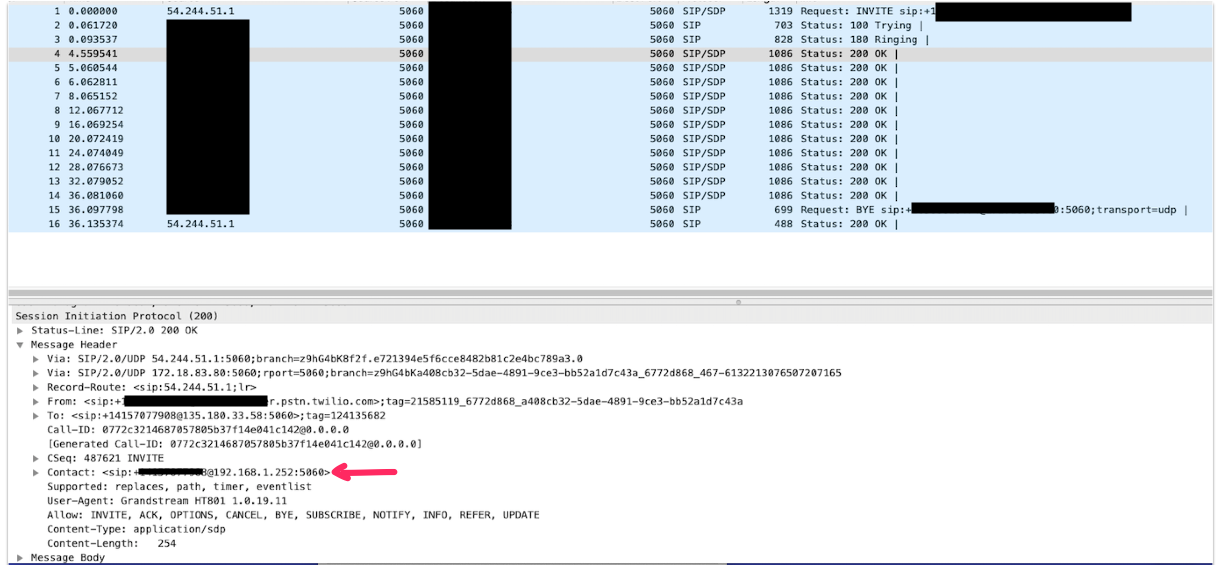
At first, I ended up hard-coding my public IP address in this section of the Grandstream configuration like this:
Use NAT IP: 123.456.78.90
However, there were some issues if you put in your Public IP address -- better hope it doesn't change! This "hack" overrides the internal IP address that was being returned in the Header and allows incoming calls to come in. I tried to use a Dynamic DNS address but the field only allowed enough digits for an IP address.
With the first configuration, I was having trouble receiving calls via a REST API command. Investigating into the PCAP file helped me troubleshoot. After taking a step back, I ended up figuring the right configuration!
Create a SIP Trunk
Name it something and add an Origination URL: sip:username@your_domain.sip.us1.twilio.com
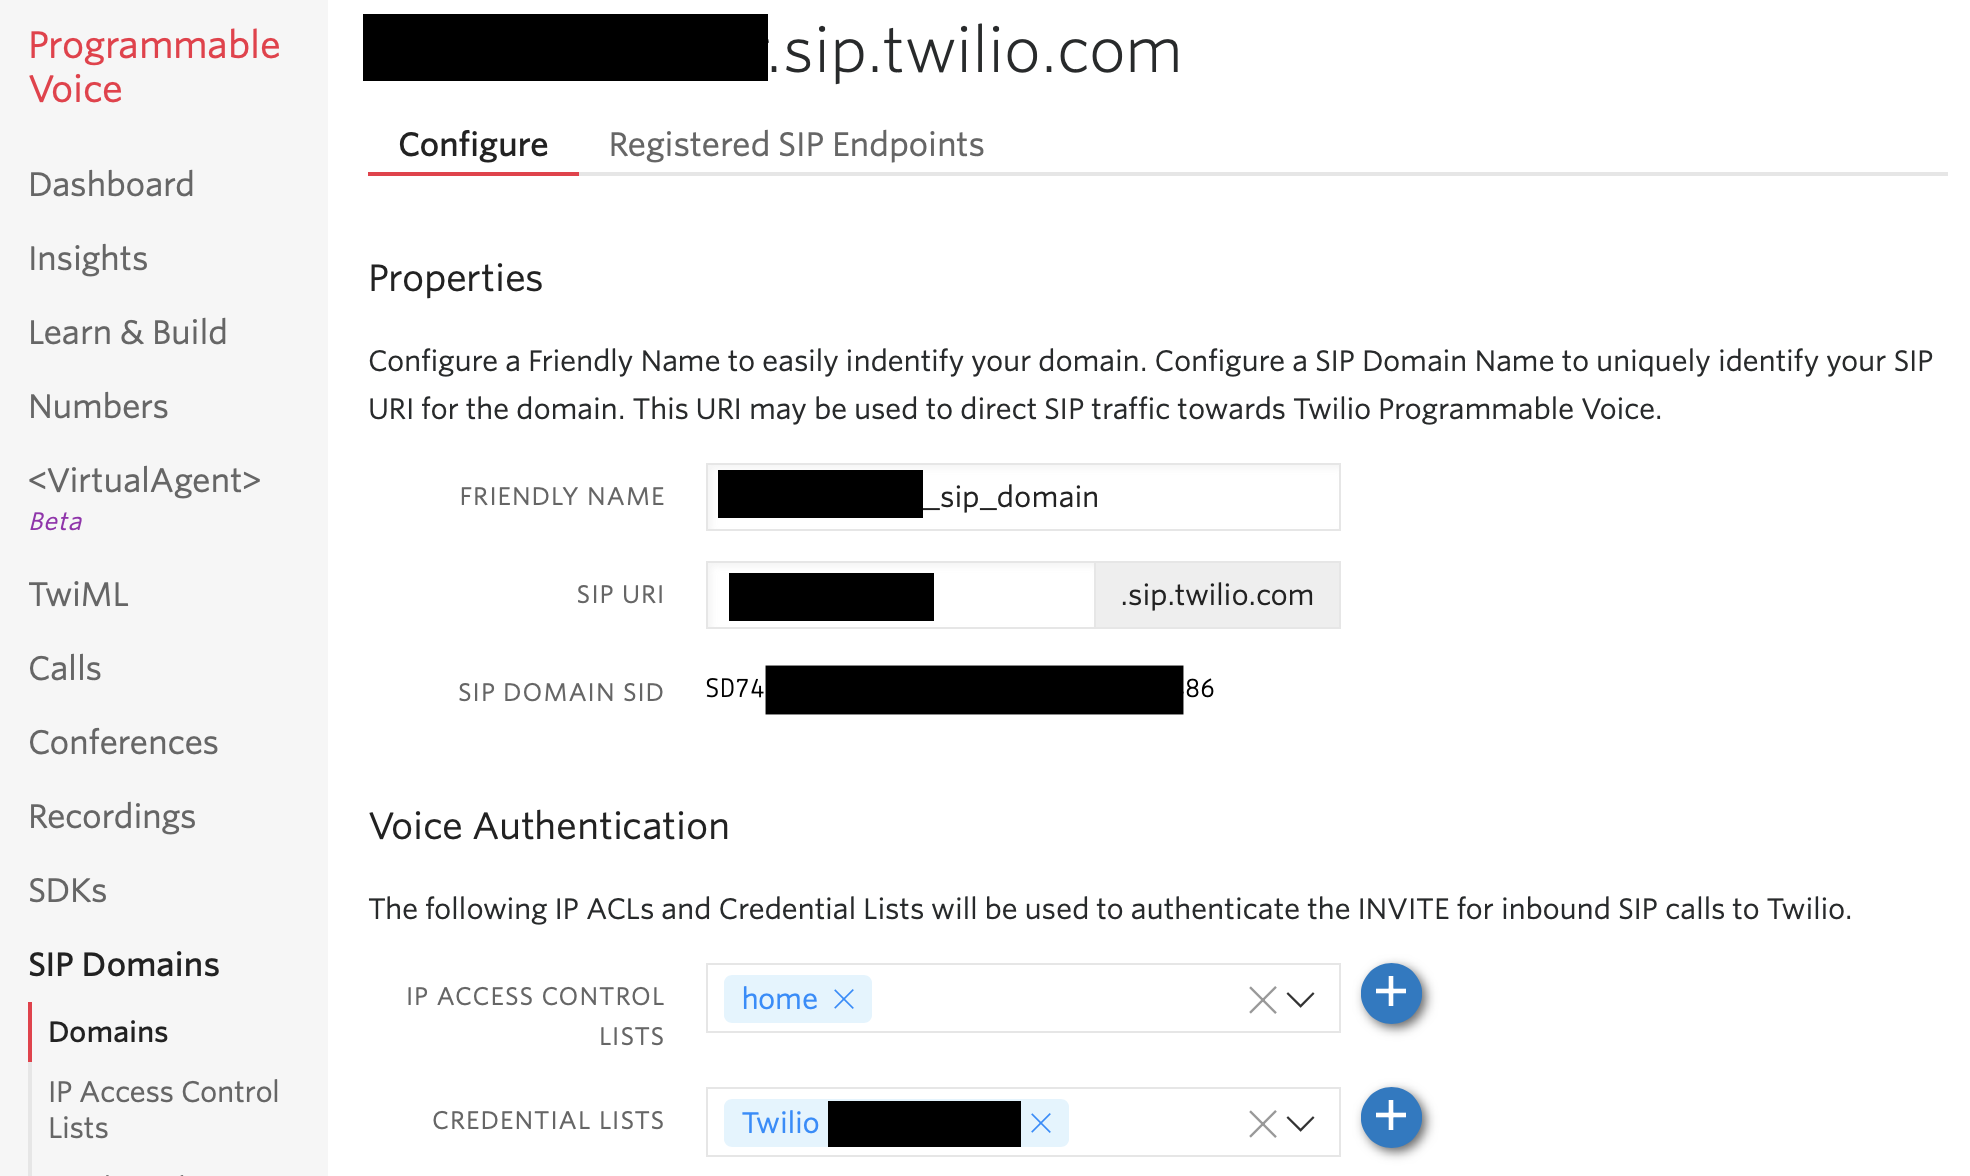
Configure a SIP Domain in Twilio Programmable Voice
make the SIP URI something easy for you to remember. This will be the url of the Primary SIP Server on your Grandstream box. With that, you'll have to add a value to the IP Access Control List and a Credential List. The username/password you put in your Credential List will be the SIP User ID and the Authenticate ID on your Grandstream box.
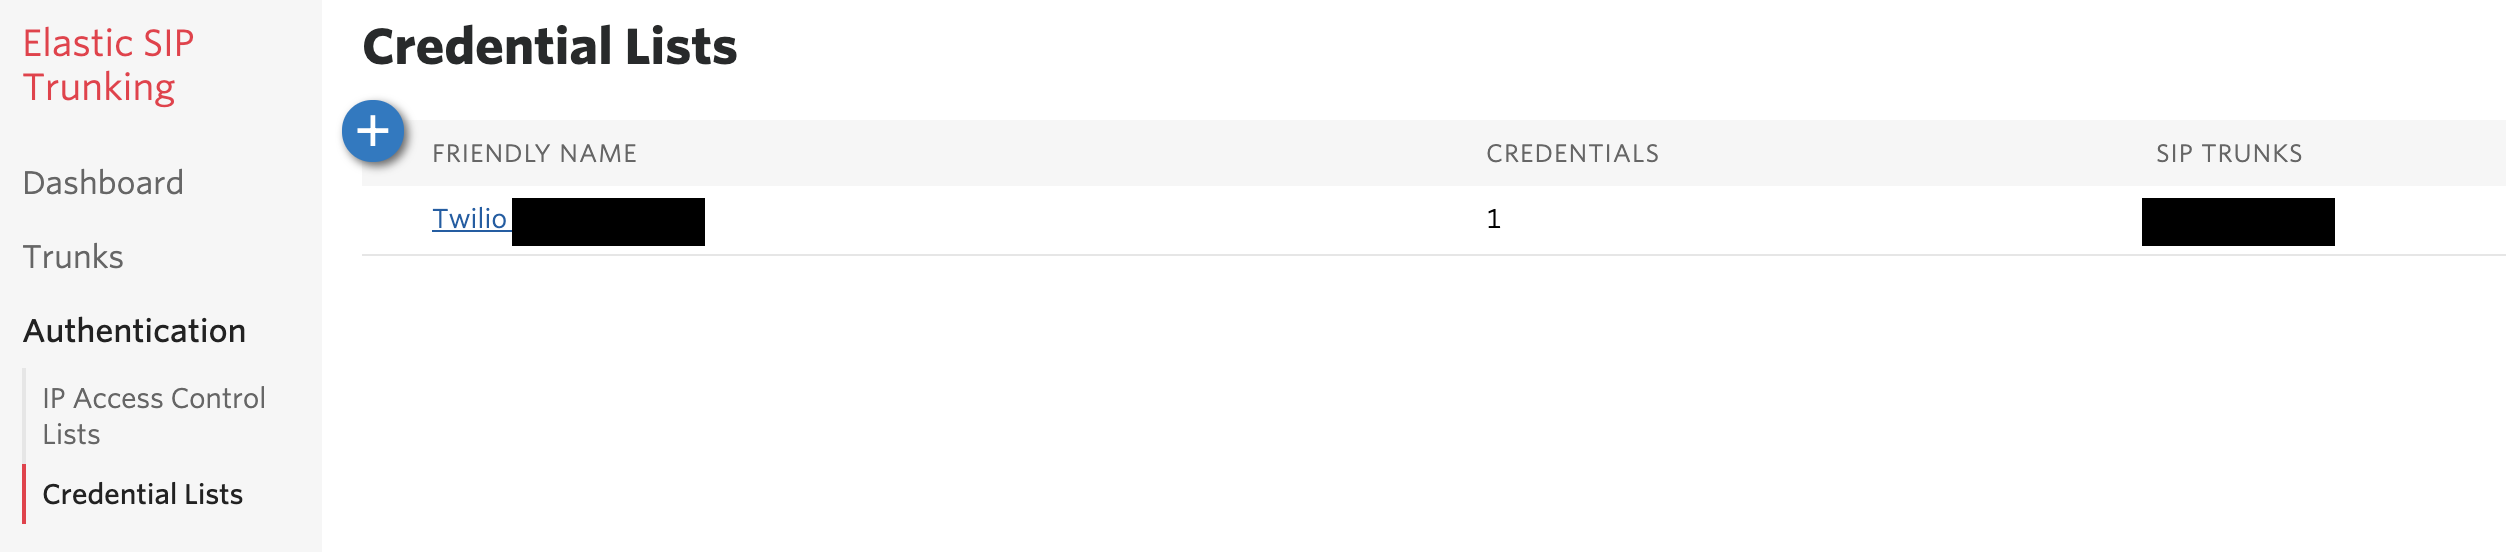
Create a Credential
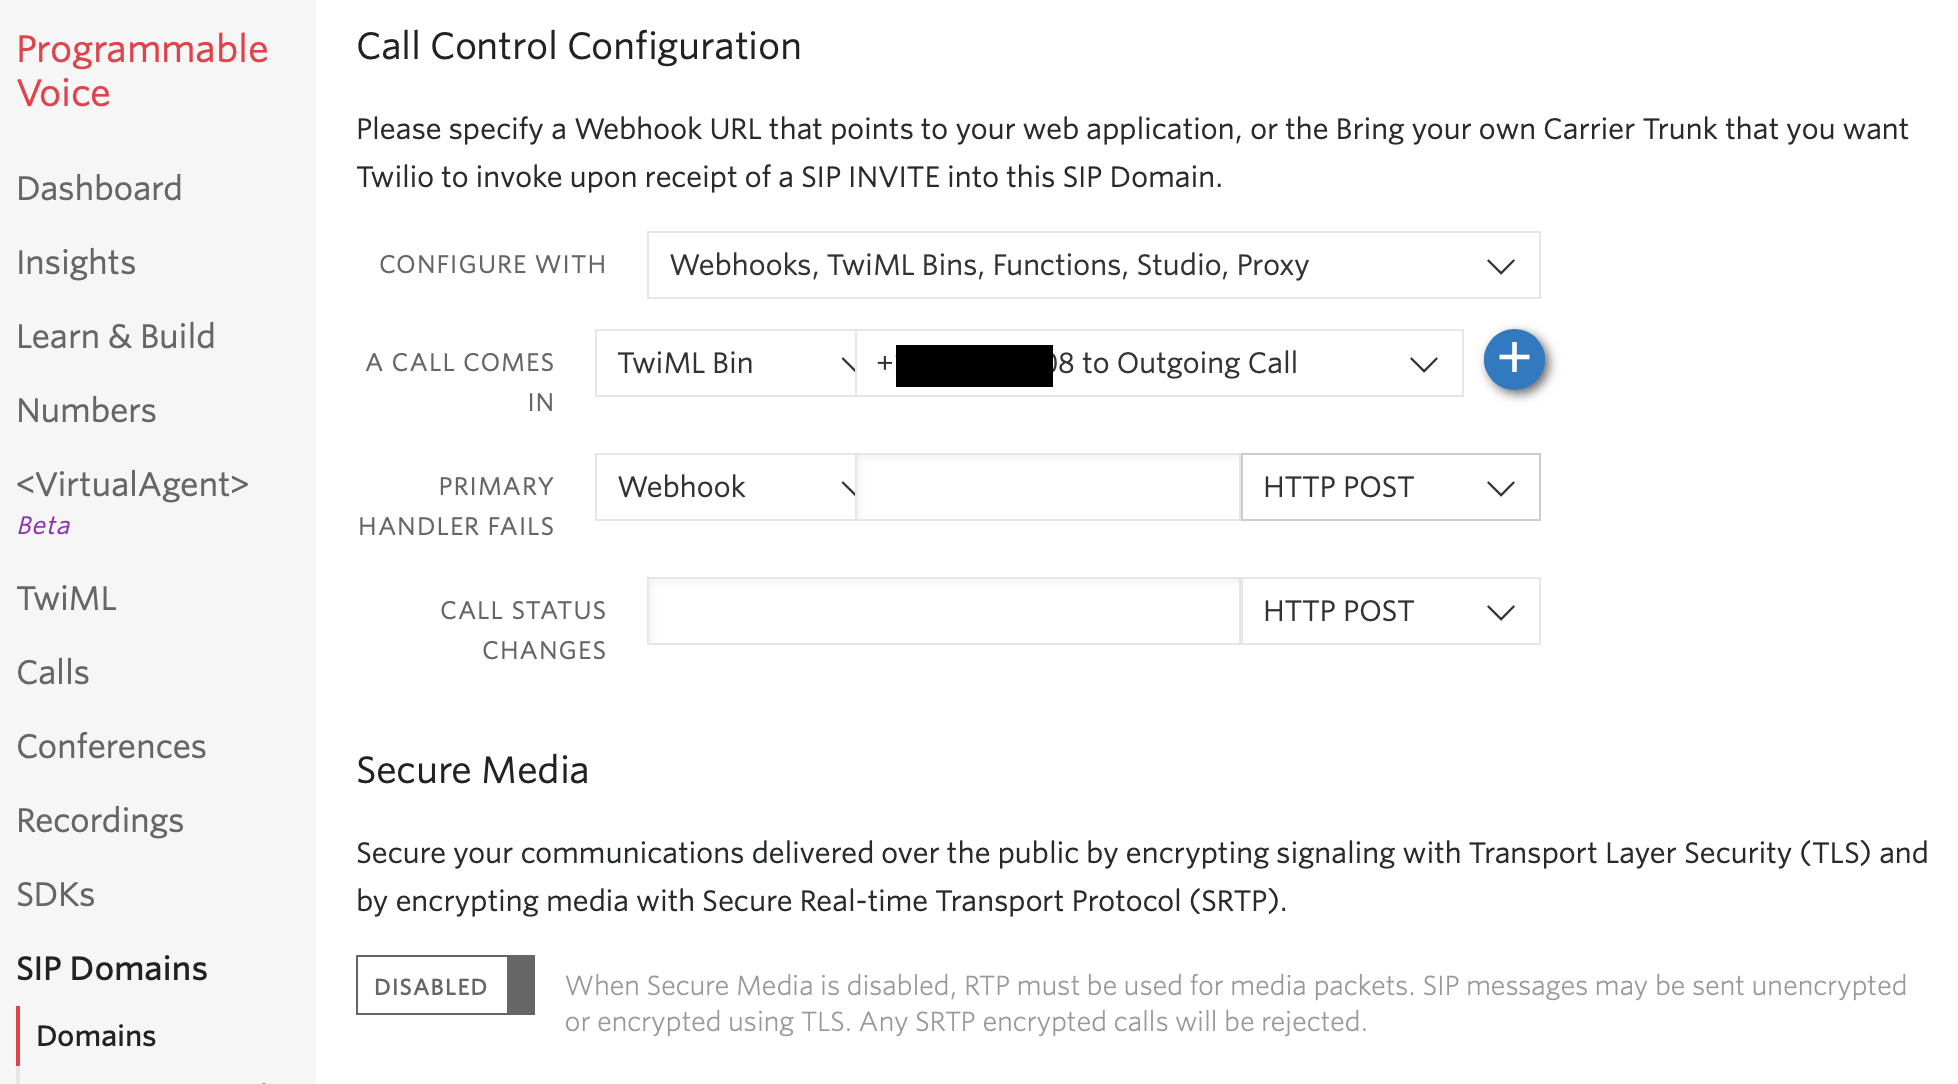
Configure Outgoing Calls with a TwiML Bin
While you're here, scroll down and add a TwiML Bin for when A Call Comes In so you can make outgoing calls.
<?xml version="1.0" encoding="UTF-8"?>
<Response>
  <Dial callerId="+14151234567">{{#e164}}{{To}}{{/e164}}</Dial>
</Response>
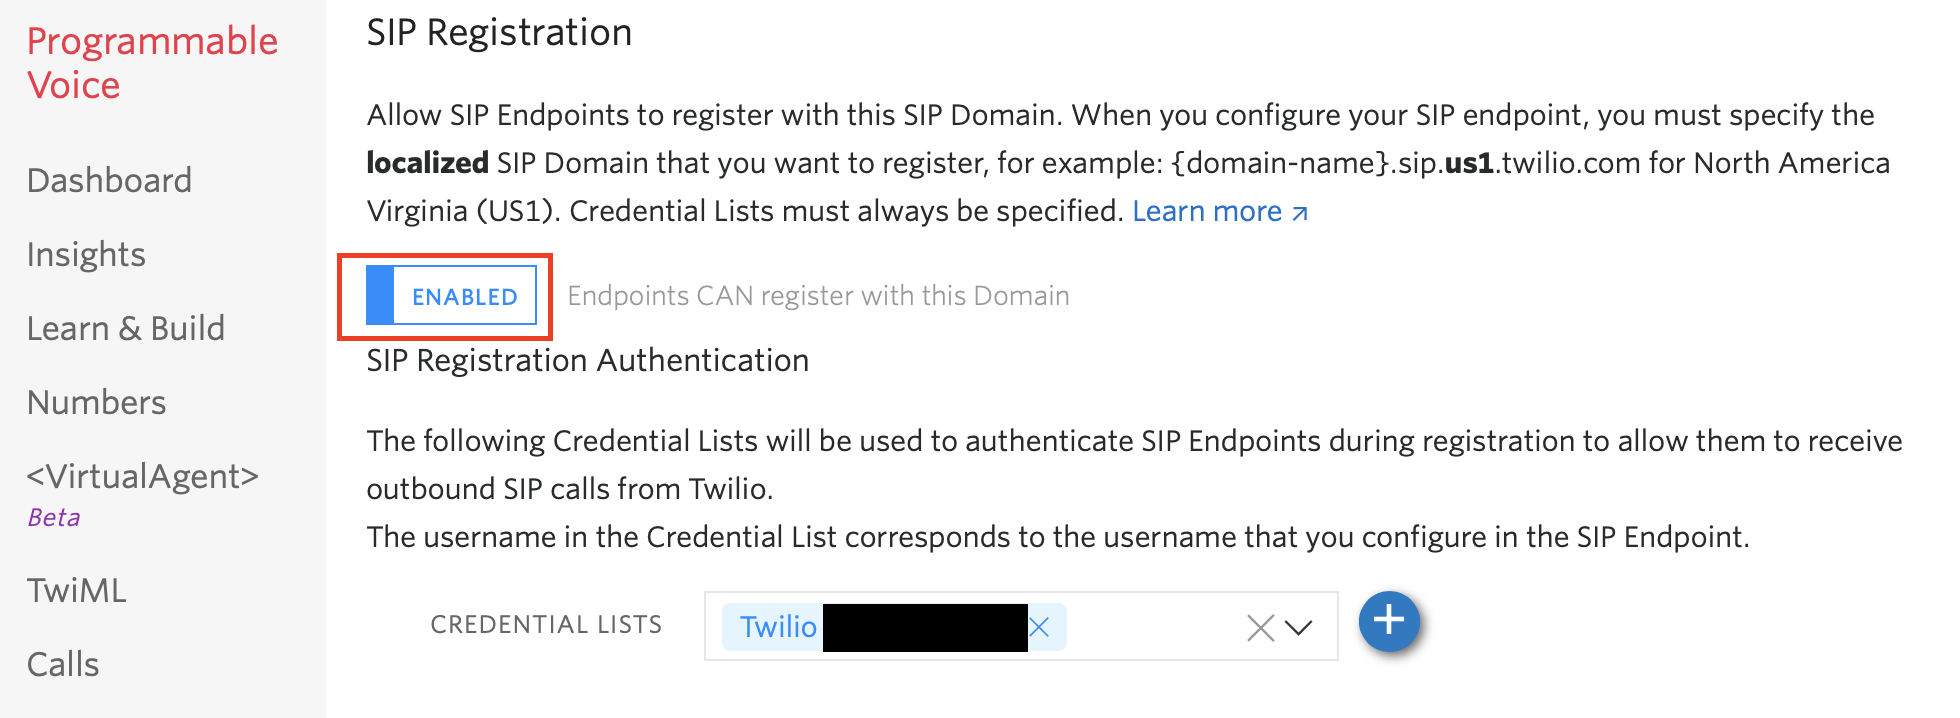
SIP Registration
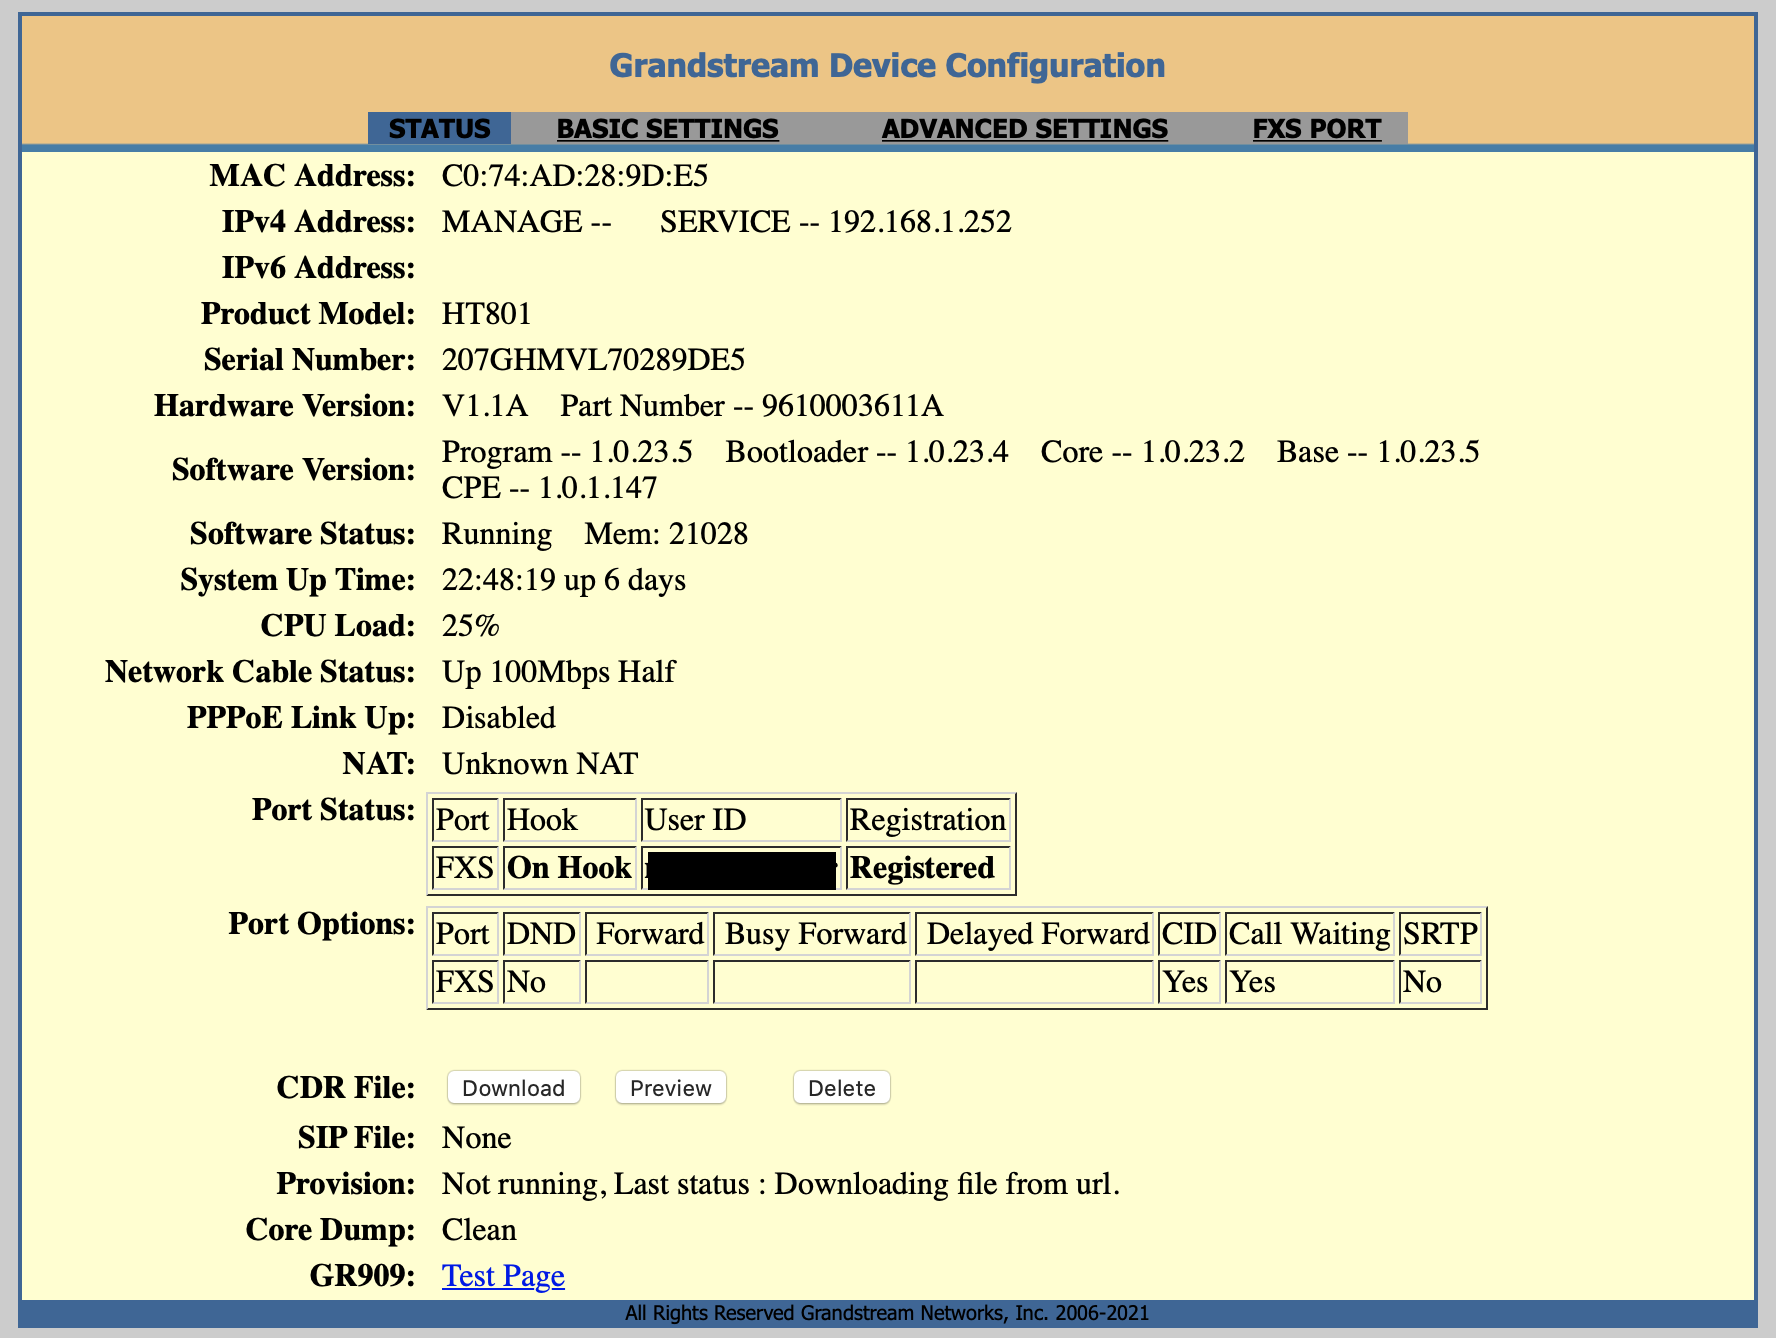
Screenshot of Grandstream Configuration
When I was looking for help on the configuration, I kept seeing sections but wanted the FULL image. So, here's mine, in its entirety.
Update the following fields:
- Primary SIP Server: your_domain.sip.us1.twilio.com
- SIP User ID
- Authenticate ID
- Authenticate Password
- SIP REGISTER Contact Uses: WAN Address
- Check SIP User ID for incoming INVITE
- Dial Plan Prefix: +

Confirm SIP Registration
You'll see your username and "Registered" on the Port Status line.
Configure Incoming Calls With a TwiML Bin
As outlined here
<?xml version="1.0" encoding="UTF-8"?>
<Response>
  <Dial answerOnBridge="true">
    <Sip>username@your_domain.sip.twilio.com</Sip>
  </Dial>
</Response>
Go to your phone number in the Numbers Tab and click on it.
When a Comes In: run the TwiML Bin you just created above.
Next Steps
It'd be fun to setup a PBX server and have IP Phones with different extensions for each room in my house, but it's probably extreme overkill for what I need. Here's how I incorporate the ATA landline into a new type of Wake Up Call Alarm project.
Comments
Comments are currently disabled. Feel free to reach out on social media!