

ESPHome Stereo
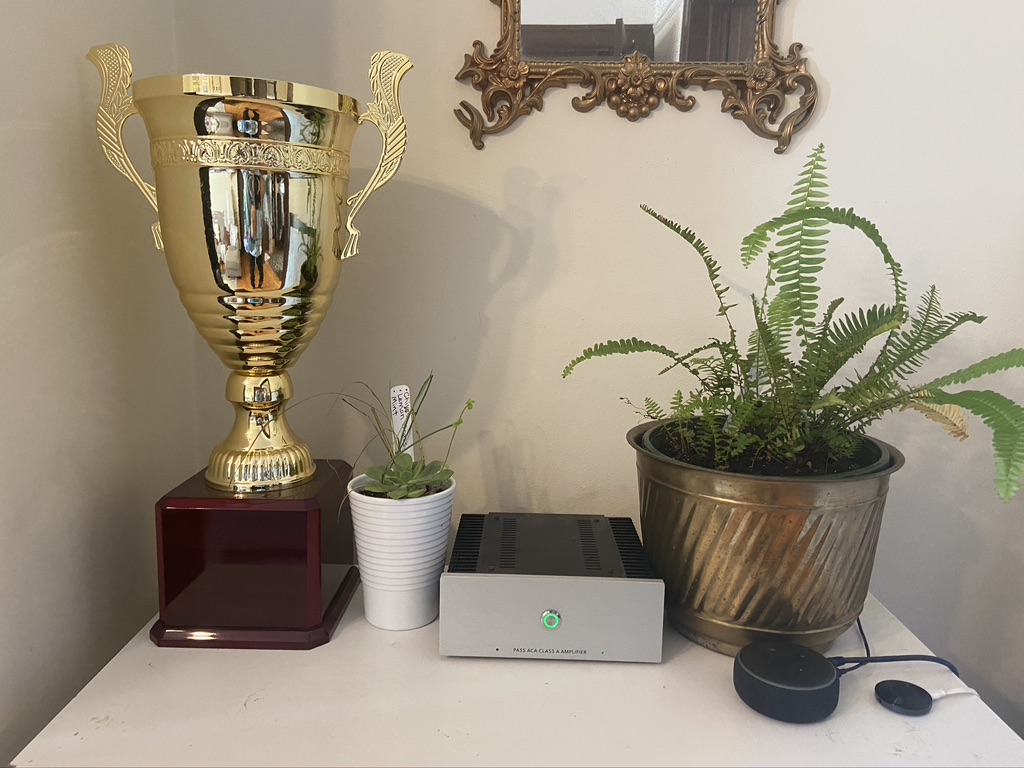
July 20, 2019Finished Product:
Background
My Dad is really into stereos and he's an engineer, so naturally he passed his love and appreciation for music and electronics down to me. We've attended Burning Amp from 2016 - 2019 together and after the event is usually the beginning of a new project. If you've never been before, it's a giant show-and-tell and they have a big parts lottery at the show where people donate extra components from their projects. Often times, you get one piece (like a PCB for an amplifier) that sparks the idea to build a new amplifier.
Pass Labs Amp Camp Amp
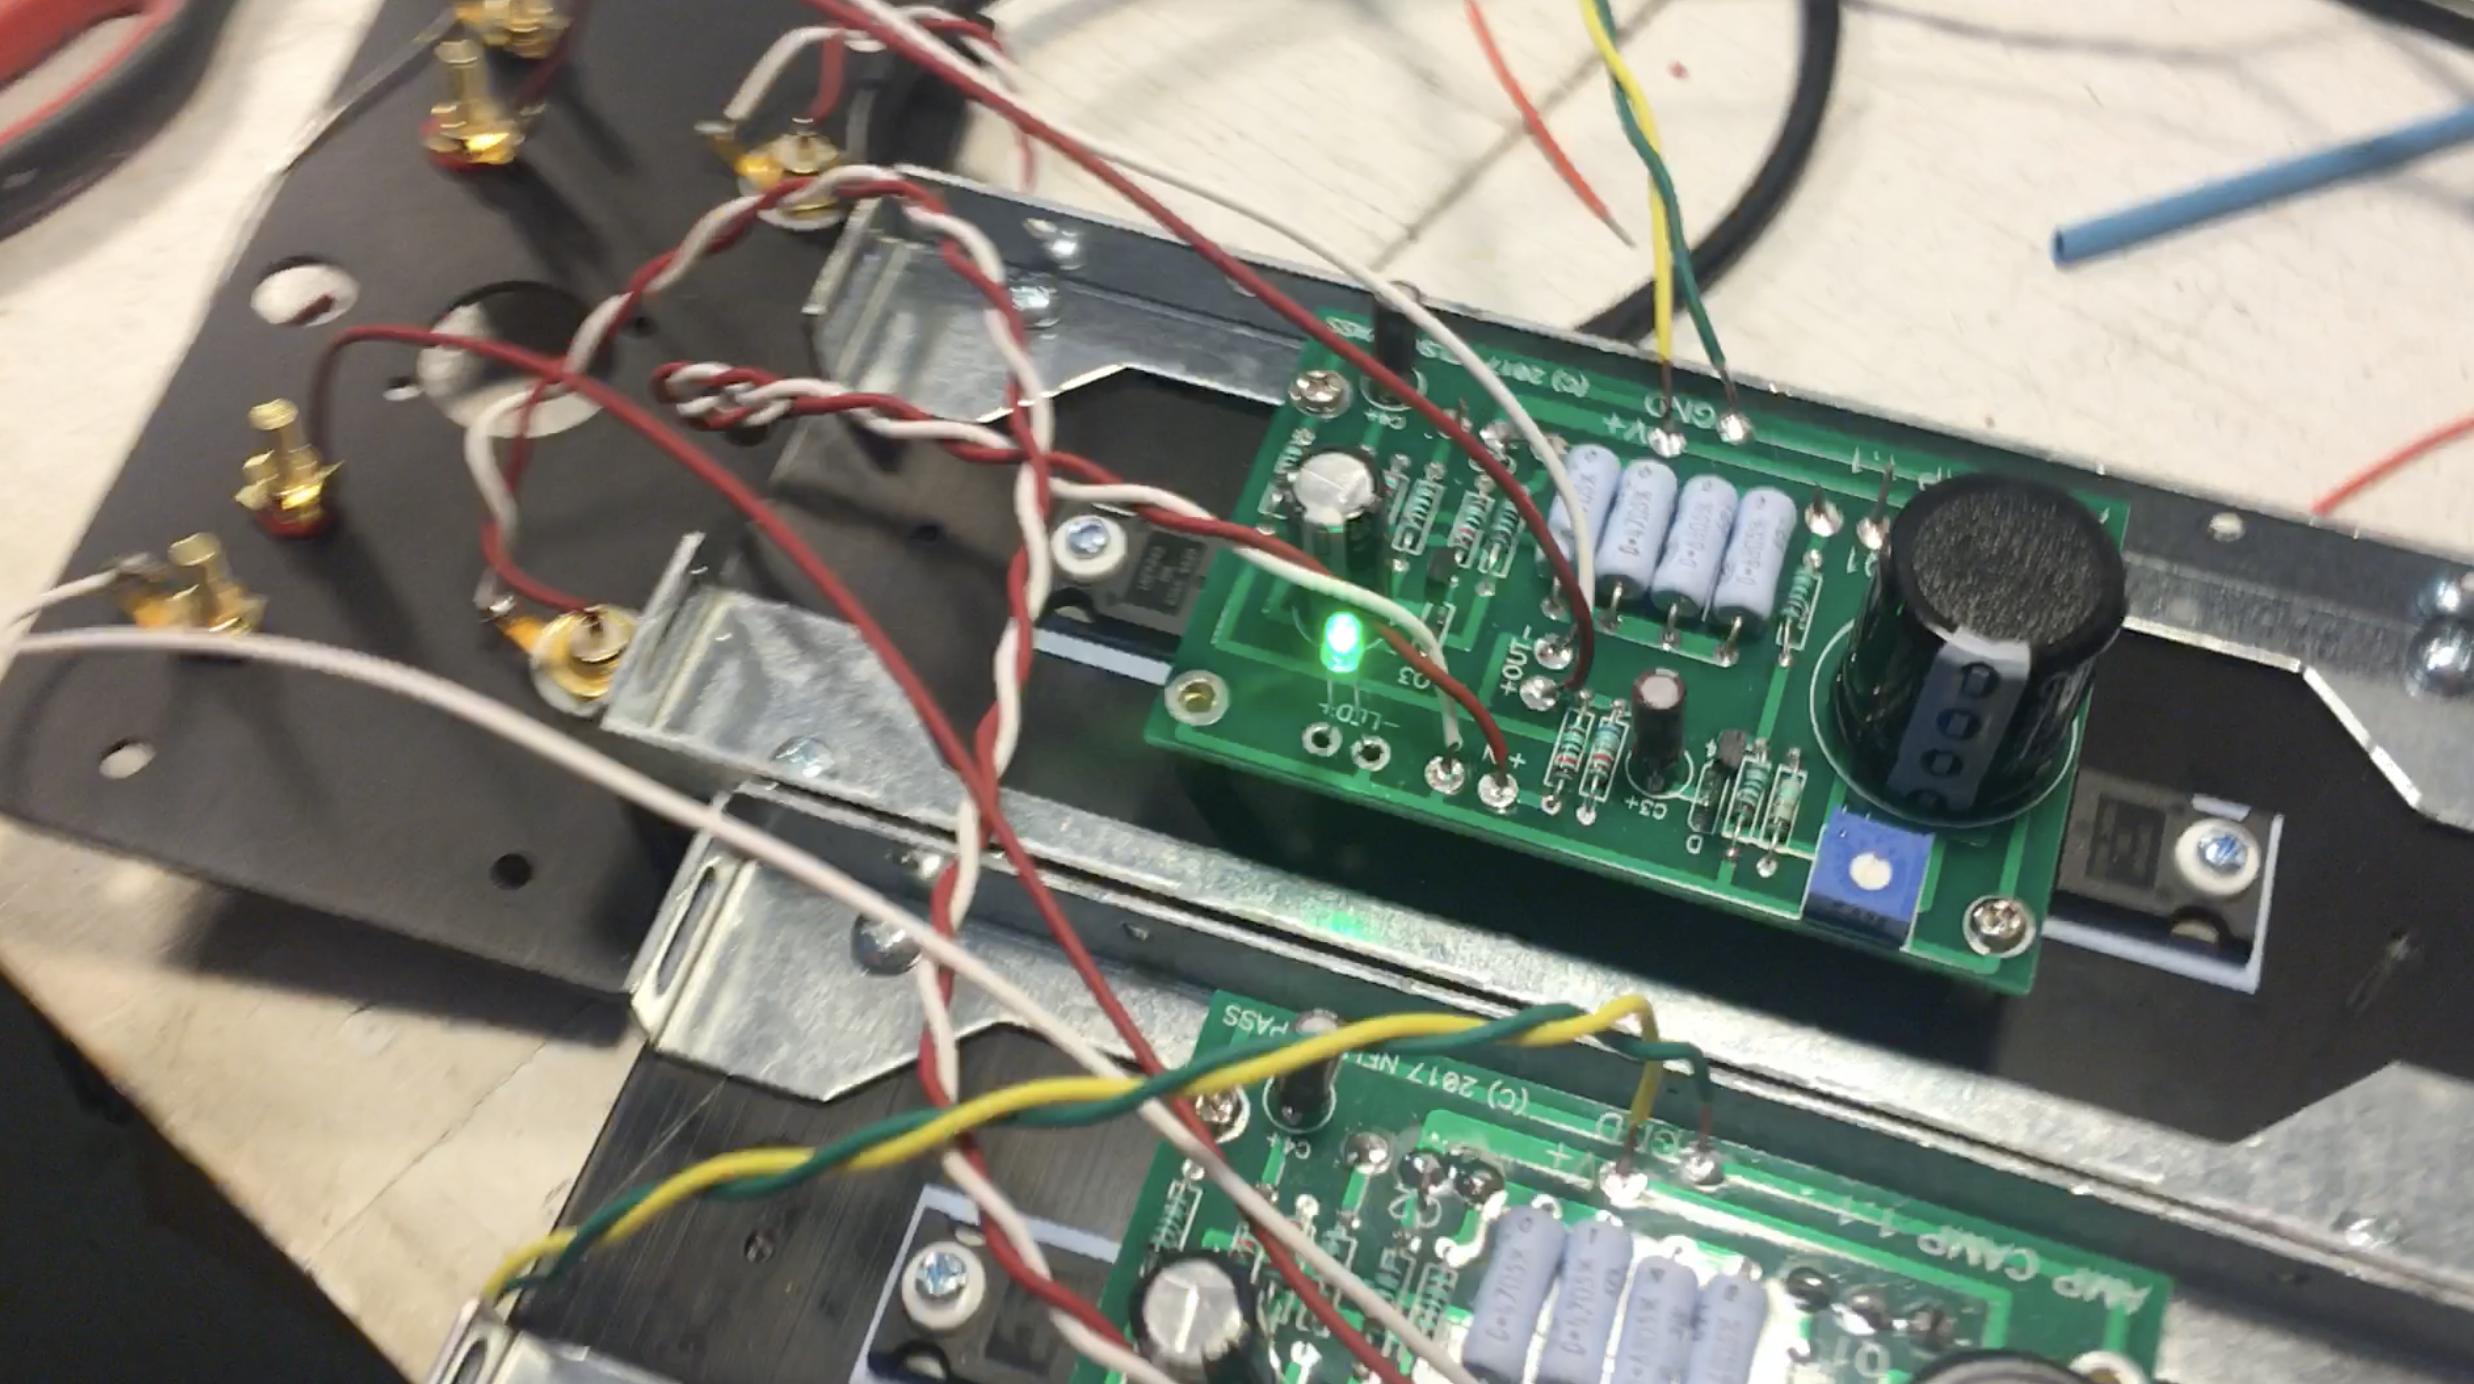
In 2018, we picked up the Pass Labs "Amp Camp Amp" PCB. This was designed by Nelson Pass and made for people to assemble during a one-day Amp Camp. Here's a quick picture of the PCB populated with all the components and completing a successful "spark test". The first time you add electricity to the project is often called that because you'll quickly find out if you assembled everything correctly. In this situation, the green LED turned on and there weren't any issues.
Putting the Amp together and soldering the components wasn't extremely difficult -- that's not the main point of this post. If you're looking for a video with all the details, check out this video from Patrick Norton over at TekThing:
TekThing Amp Camp Amp Build
The next step was to assemble the case.
So what?
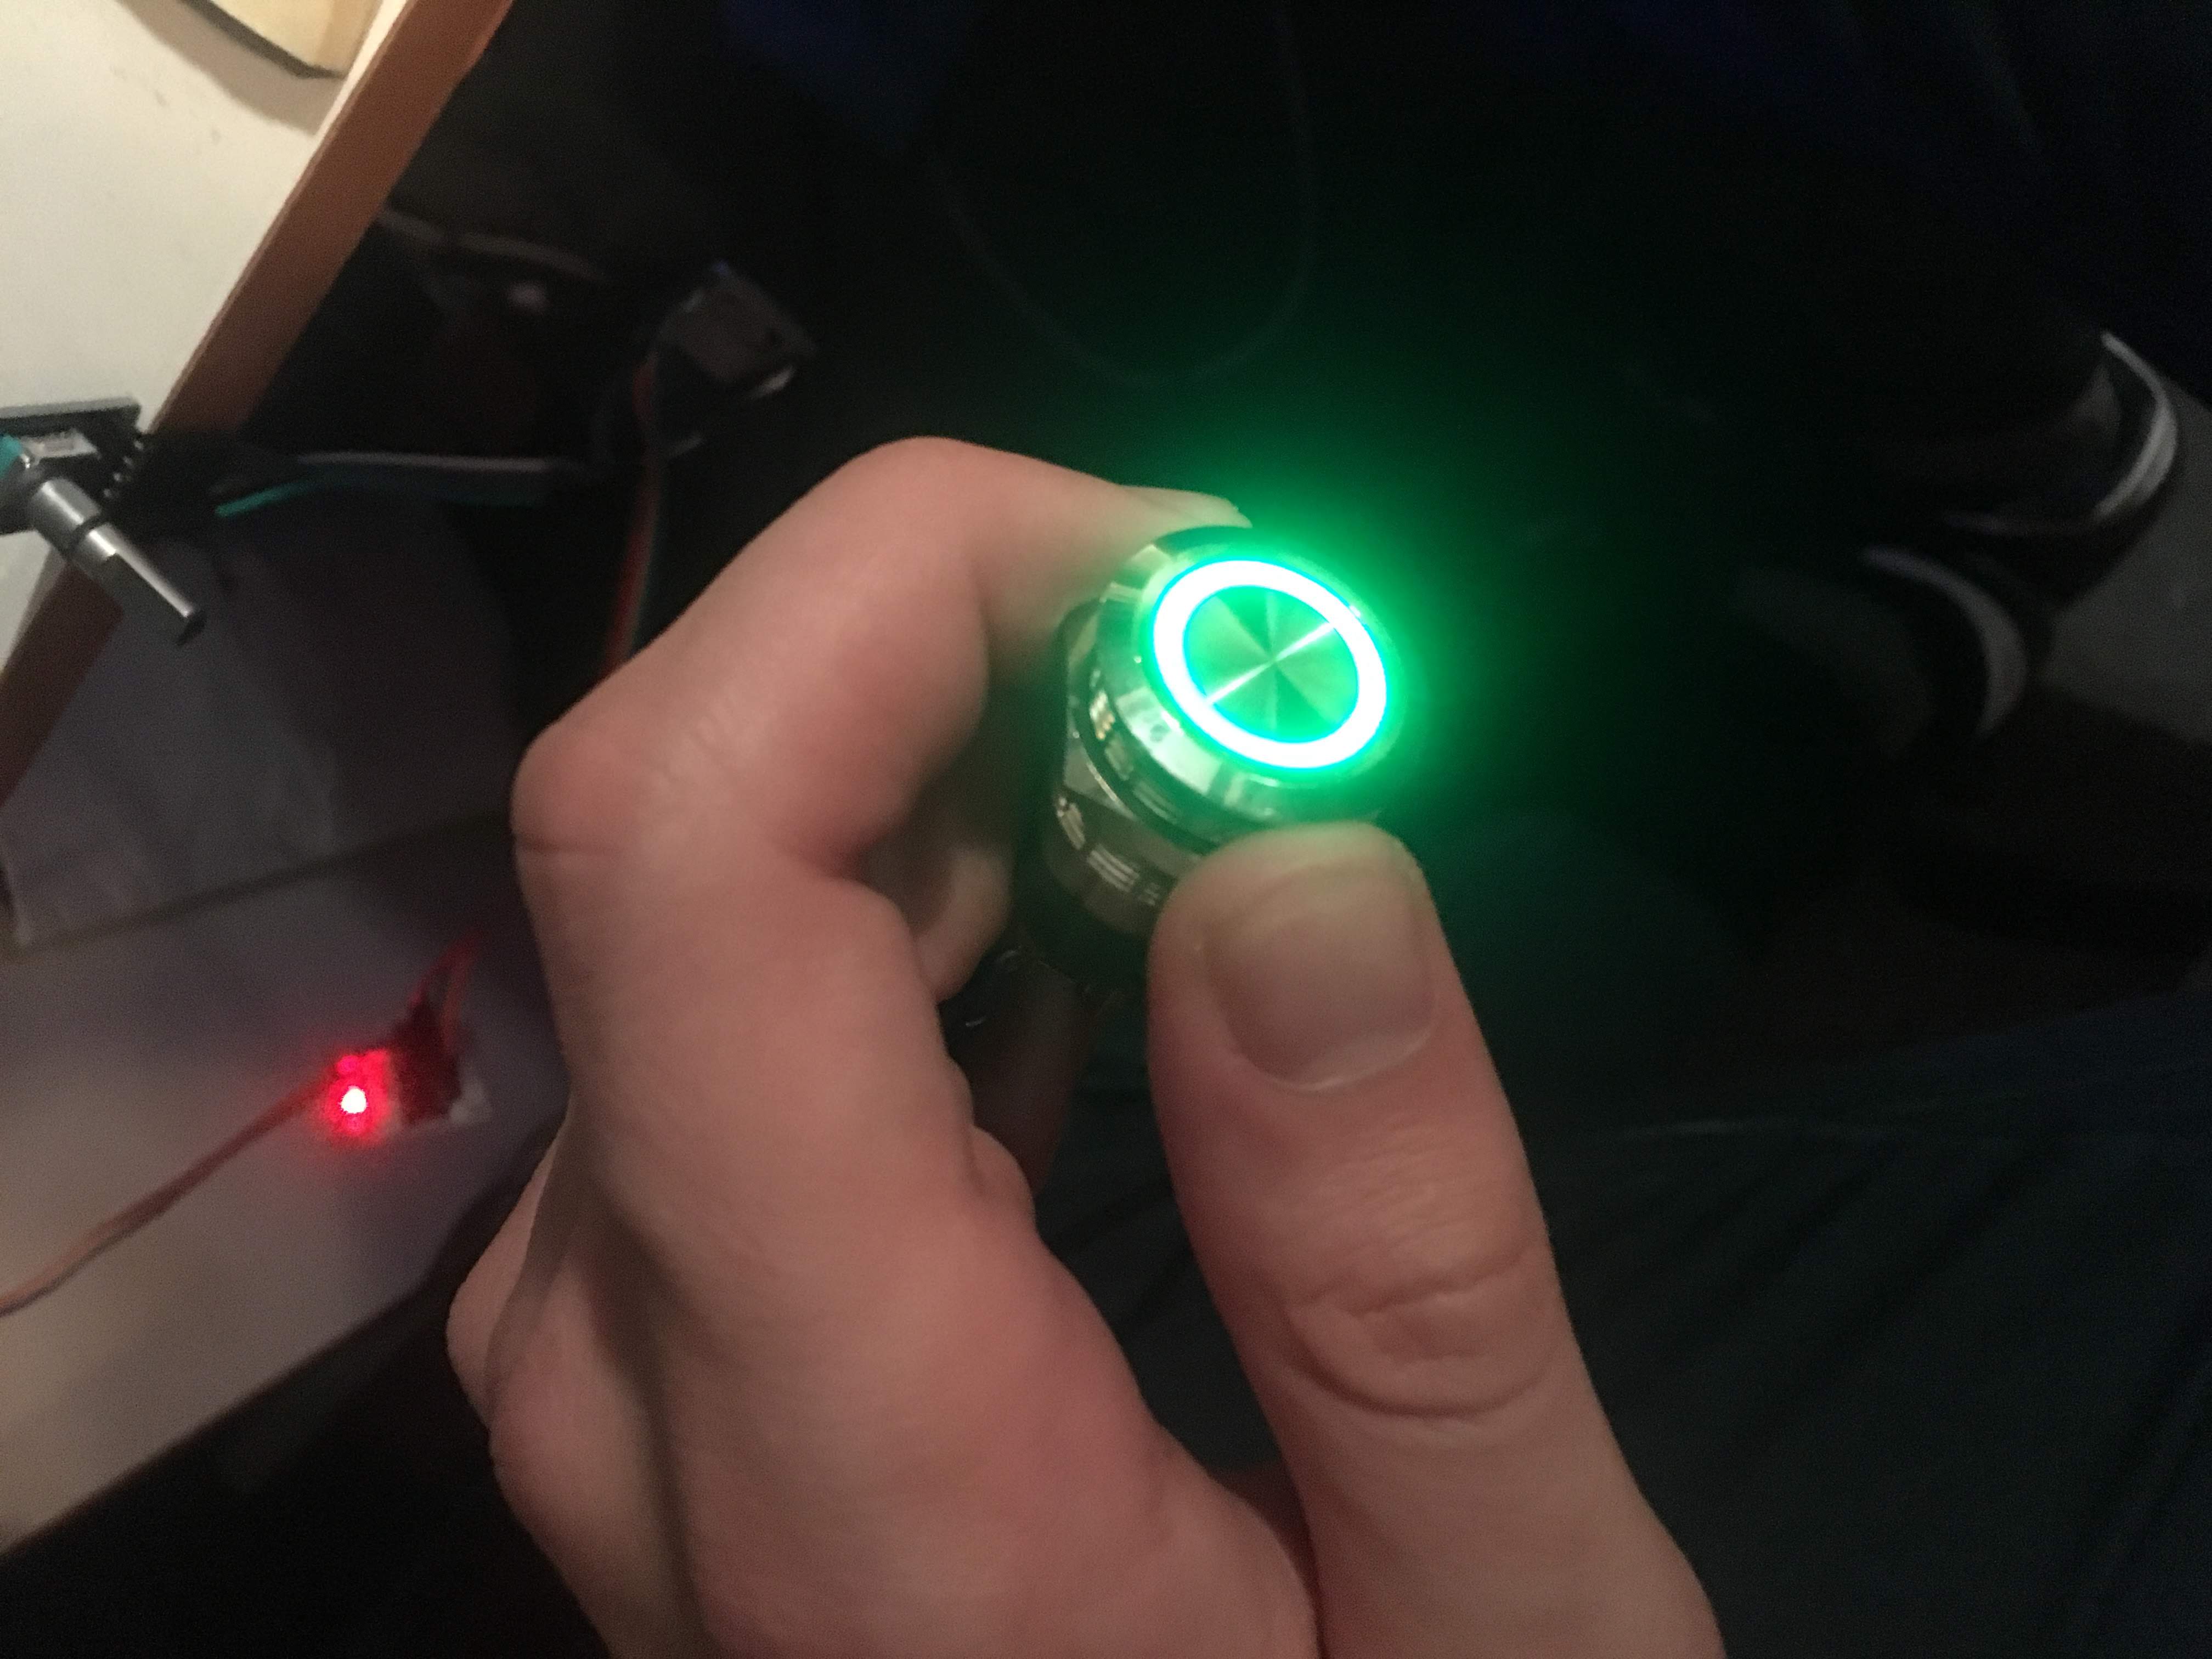
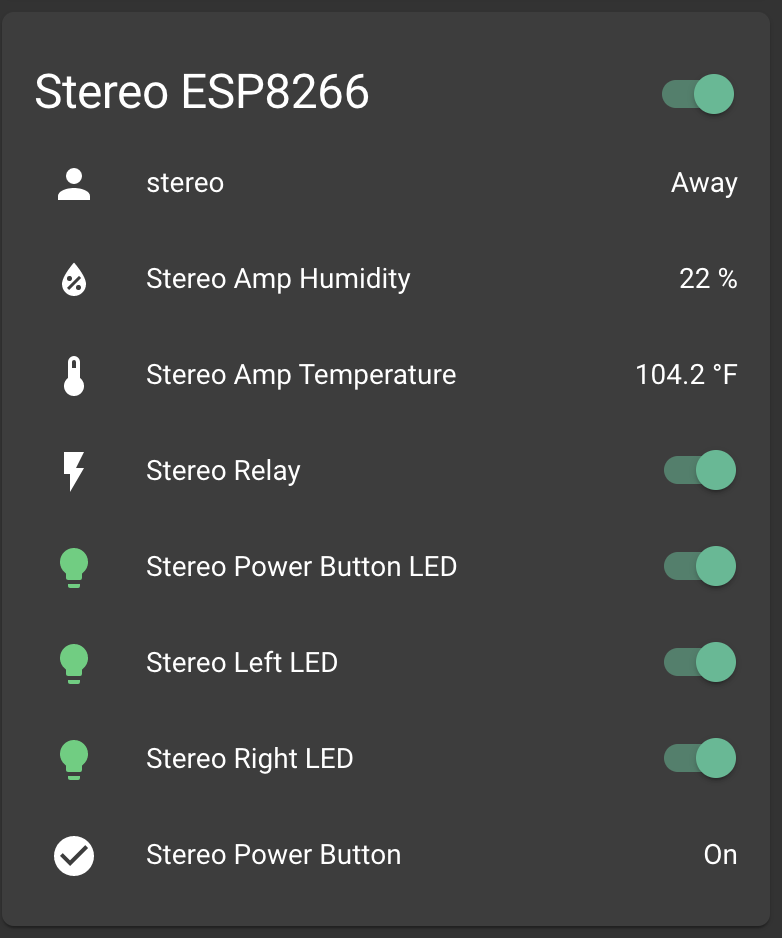
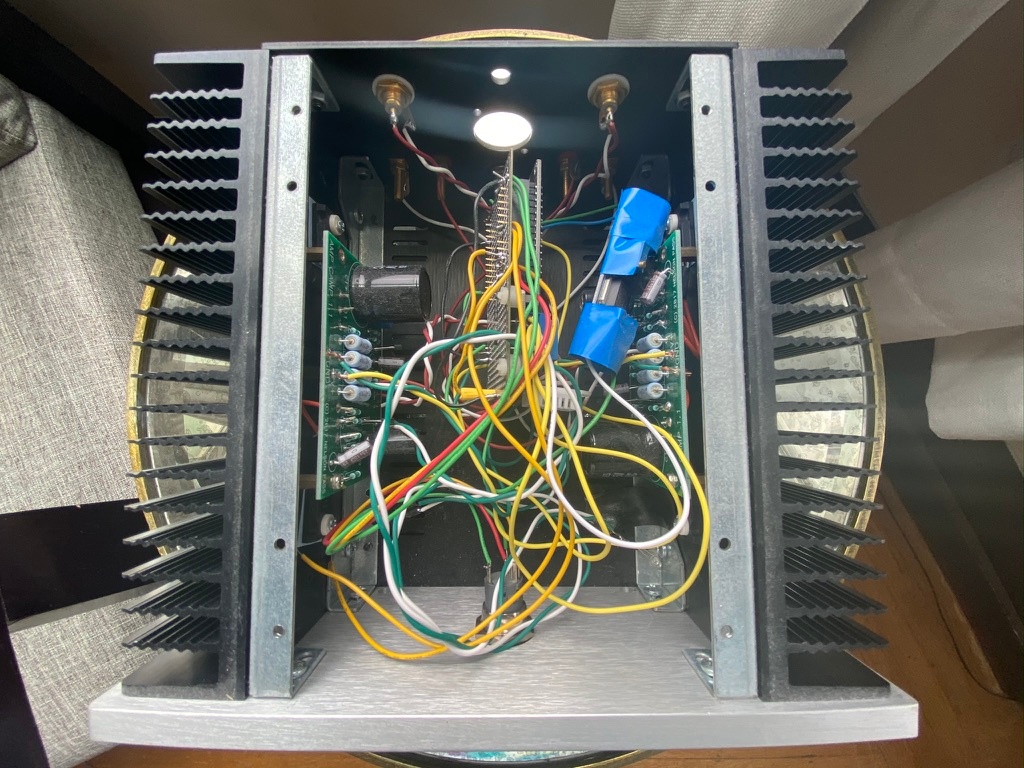
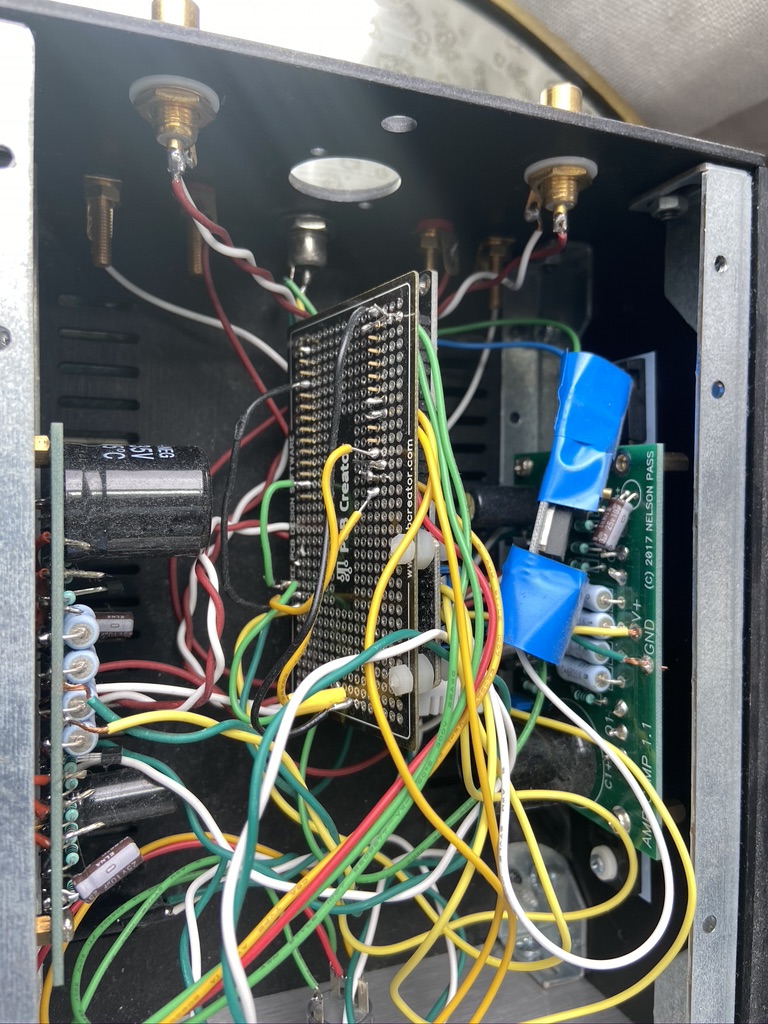
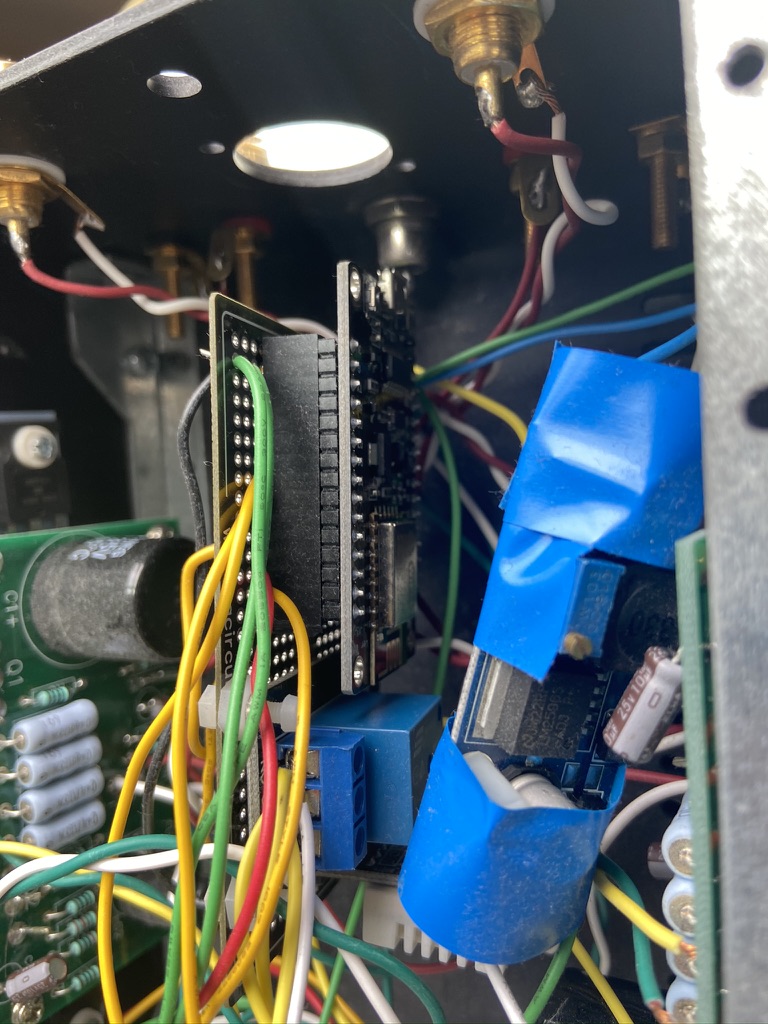
The part of the project that I want to highlight and what makes unique is I added an esp8266 microprocessor running ESPHome. With this, I can control a relay (and therefore the stereo) as well as the LEDs with Home-Assistant. I also changed the switch to a relay button with a green LED.
These amplifiers give off a lot of heat, so I can add automations like "turn off the amplifier when I'm not home" or "turn off the LEDs if I'm listening to music in a dark room and later turn off the amplifier after I fall asleep". An additional feature I added was a temperature sensor, because I was really curious about how hot the stereo gets and thought it'd be interesting to keep track of in a database.
Here's a picture of the insides. Unfortunately, I don't have a schematic available at the moment.
ESPHome YAML Config
esphome:
  name: stereo
  platform: ESP8266
  board: nodemcuv2
wifi:
  ssid: "Network_SSID"
  password: "wifi_password"
# Enable logging
logger:
# Enable Home Assistant API
api:
ota:
light:
  # ... and then make a light out of it.
  - platform: monochromatic
    name: "Stereo Power Button LED"
    output: green_led_power
    id: light_green_led_power
  - platform: monochromatic
    name: "Stereo Left LED"
    output: green_led_left
    id: light_green_led_left
  - platform: monochromatic
    name: "Stereo Right LED"
    output: green_led_right
    id: light_green_led_right
output:
  # Register the green LED as a dimmable output ....
  - platform: esp8266_pwm
    id: green_led_power
    pin: D1
    # inverted: True
  # Register the green LED as a dimmable output ....
  - platform: esp8266_pwm
    id: green_led_left
    pin: D5
    # inverted: True
  # Register the green LED as a dimmable output ....
  - platform: esp8266_pwm
    id: green_led_right
    pin: D6
    # inverted: True
switch:
  - platform: gpio
    name: "Stereo Relay"
    id: relay1
    pin:
      number: D3
      inverted: yes
    on_turn_on:
      then:
        - light.turn_on: light_green_led_power
        - light.turn_on: light_green_led_left
        - light.turn_on: light_green_led_right
        # - binary_sensor.turn_on: id_relay1_binary
    on_turn_off:
      then:
        - light.turn_off: light_green_led_power
        - light.turn_off: light_green_led_left
        - light.turn_off: light_green_led_right
        # - binary_sensor.turn_off: id_relay1_binary
# This is the front button on the stereo amplifier. pressing it should turn the relay on/off
binary_sensor:
  - platform: gpio
    pin:
      number: D2
      mode: INPUT_PULLUP
    filters:
      - delayed_on: 100ms
      - delayed_off: 100ms
    name: "Stereo Power Button"
    id: id_relay1_binary
    on_press:
      then:
        - switch.toggle: relay1
sensor:
  - platform: dht
    pin: D0
    temperature:
      name: "Stereo Amp Temperature"
    humidity:
      name: "Stereo Amp Humidity"
    model: AM2302